More jewelry

Standard

I have been really enjoying my new journey of jewelry making. I enrolled in a craftsy class for jewelry making and I learned to make some really cute earrings. I think craftsy is such a good invention. Can take the classes at your own time, they are affordable and you can play something over and over till you get it.

20120429-160356.jpg

20120429-160402.jpg

20120429-160408.jpg

I am loving the techniques I am learning. I still have a lot to learn, but practice makes perfect, so they say. I am not done with the course yet. Lot of other fun stuff I will make and will show over time.
I did make some other things as well.

20120429-160700.jpg

20120429-160708.jpg
Matching necklace and earrings with my fairy dream bracelet.

20120429-160751.jpg

20120429-160803.jpg
Some more bracelets

20120429-160834.jpg
And a chain maille bracelet. This one is made of 200+ jump rings. I was crossed eyed by the time I was done with it.

Happy crafting everyone. I think I should show my sewing machine some love, I have been neglecting her since my jewelry making spree.

Midnight butterfly

Standard

So I said I wasn’t going to make any quilts anymore, because lack of space. But then you open up your fabric closet and all those fabrics are looking at you and yeah, I just couldn’t resist. I went trough my stash and found this wonderful butterfly fabric with some gold in there. I had the matching fabrics that I used for the smaller squares. It has metallic threads weaves in there. Basically I had all fabrics except for the border and the backing. The border took some auditioning at the fabric store, but the backing was an easy find. Little more costly then I normally would use for the back, but I just had to have it.
I used the pattern glacier moon from Hoffman fabric as my base to work from. I did change it up a little.

20120425-083732.jpg
All fabric cut and ready to go.

20120425-083803.jpg
Top is done, time to look for a border

20120425-083841.jpg

20120425-083859.jpg
All quilted and binding done. Very happy with the result.

20120425-083944.jpg
Close up from the quilting

20120425-084012.jpg
And the backing.

For now it is on my quilt pile that is growing rapidly, until I figure out what I want to do with it.

Kreativ blogger award

Standard

I got nominated for the kreativ blogger award by Avis. She makes wonderful quilts and has awesome tutorials. She is a really creative person, and I want to thank her for nominating me.

Now I have to share 7 fun facts about myself with my readers, so here goes.

1. I was born and raised in the Netherlands and moved to Maui in 2007

2. I look younger then I am 🙂

3. I have an handsome 11 year old son

4. I am a breast cancer survivor

5. I get cold in winter here in Hawaii

6. Thinks that coming up with 7 fun facts is harder then it looks

7. I only started quilting a few years ago. Before that I thought it was dull and an old ladies hobby 😉

Thank you again Avis for nominating me. Now it’s time to go back to the sewing machine and work on something.

Jewelry

Standard

So I live in a small house, cute but small and it has only one bedroom. That means that I don’t have a lot of space to store quilts. I kind of ran out of space, so I thought to try something else and give jewelry making ago. The finished projects take up lesser space 😉

20120401-145238.jpg

This Indian agate bracelet was my first project. I used a little kit for this one and I was surprised how easy it was to make.

20120401-145345.jpg

My next project was this cute little set. This also came as a kit. You need to start somewhere right. But I was feeling inspired.

20120401-145502.jpg

The next logical step was designing my own piece. Because I really enjoyed making that first bracelet I decided to go out and buy some beads to make one in colors I really enjoy.
I call this one “fairy dream”. I am working on a matching necklace and earrings.

20120401-145709.jpg

This set also came from a little kit.

I am not done with quilting of course, I just finished an other quilt top that now needs to get quilted, but I think it is fun changing things up 🙂

Craftsy’s art quilting 101

Standard

I did an other fun course at craftsy.com. This time art quilting 101, awakening the art quilter within. And she is waking up alright. It was a real fun journey, so different from what I normally do. But then again the stupendous stitching was a little step in that direction already.
I had this vision for an art quilt for a while already and was never to sure how to start, but this course helped me along.

Me stubborn as I was I didn’t start out with a practice piece, I thought I could do this. Lol I was mistaken. So my first piece ended up being my practice piece in the end, and I must say that it helped to practice on the same shapes as on my final piece.
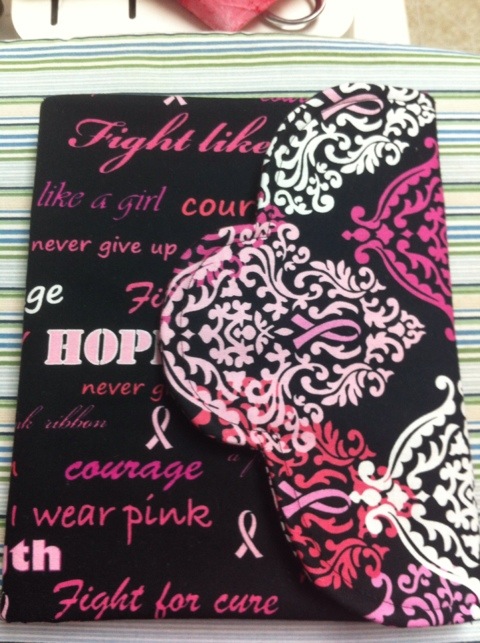
It was some practice doing the free motion thread embellishing, I don’t have quilting gloves. So I tried with bare hands and that was unsuccessful, then I tried with a hoop, but I don’t want to re hoop every so many stitches. Then I remembered that I had latex gloves in my kitchen. So I took one of them and that worked like a charm. So much easier to control the fabric.

20120321-172757.jpg

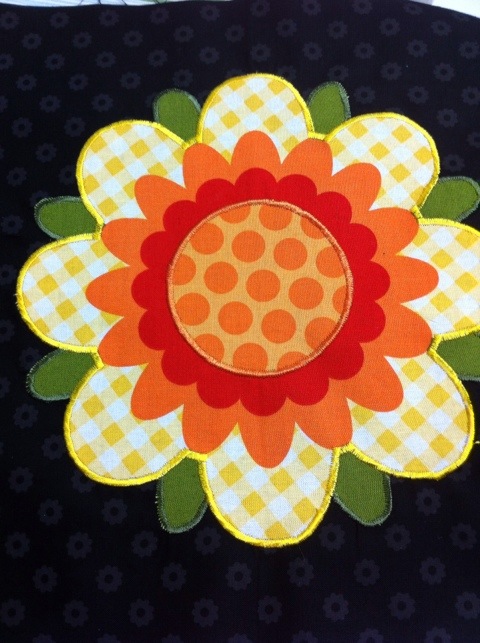
The center of the flower I made with pieces of yarn and thread, putting them between solvy and stitched over it and then washed the solvy away. One of the ideas I got in the course.

20120321-172946.jpg

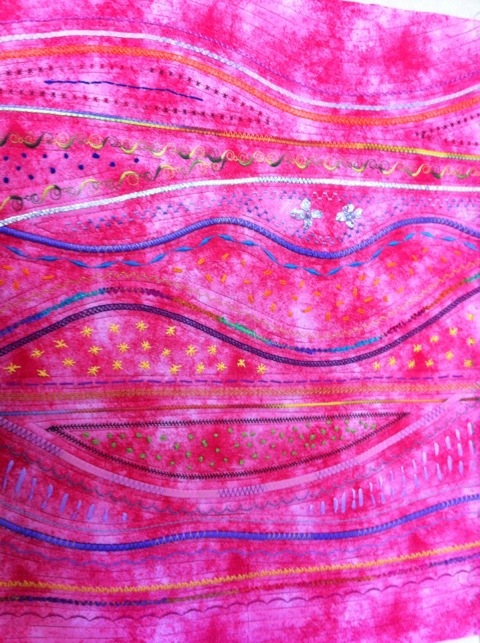
Did some couching of rattail and free motion thread embellishing. The flower paddles came out exactly the way I had in mind.

20120321-173146.jpg

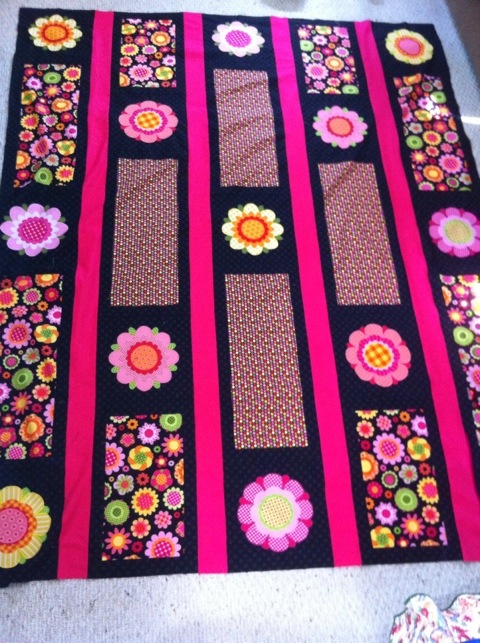
Adding butterfly’s and small border. I just love little details.

20120321-173247.jpg

20120321-173317.jpg

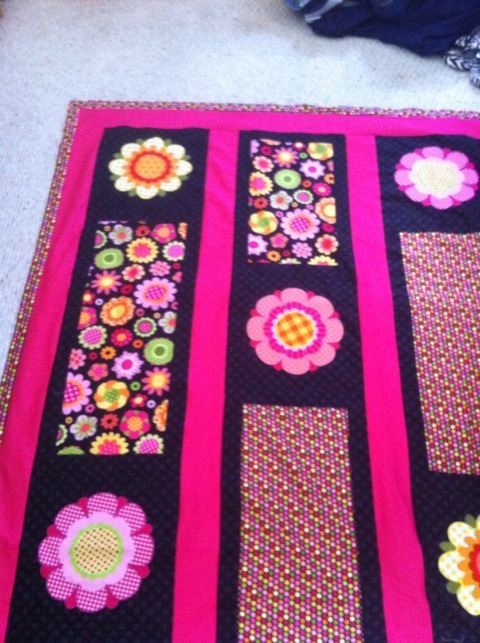
Got it all quilted and put some binding. I had to audition several fabrics for borders and if I wanted a border or just a binding. I ended up with just adding a binding.

All with all, this was an interesting journey. I still have a lot to learn, still need to get more comfortable with free motion stitching. But this is the first step into my new journey as an art quilter. The only thing lacking is a name for my first piece. Any suggestions?

Gingher

Standard

Sewing tools are really important. It does make a huge difference if you work with quality items or with cheap stuff. Sure when you are starting out and you don’t know yet if fabric arts is something you like, you start out with cheap stuff. But after a while when you have been sewing for some time you will come to that point that you want to upgrade.

When I had first moved to Maui in ’07, I worked in a fabric and sewing machine store. I didn’t bring home much cash, but plenty of fabrics to rebuild my stash. When I moved here I had to leave my sewing machine and most of my fabrics behind.
At this store is where I fall in love with baby lock and gingher. Back home I had a pfaff, but the pfaff dealer here on island is kinda junk.

But living on an island, everything is expensive. So at that time I couldn’t really afford gingher scissors. And I am all for supporting local businesses. But one day at costco I saw a gingher scissor set for a little less then $100, with a whole bunch of different scissors in there. I couldn’t say no. Lol I couldn’t afford it either so I got it as a gift. Buying 2 scissors at the sewing store would have costed me more then that. So yeah I was one happy camper with that deal.

20120317-143607.jpg

20120317-143617.jpg

I love the scissors. Of course they are off limits to everybody else in the house. I think the set is now about 4 years old and I use the fabric scissors and the thread snipper the most and they seem still as sharp as when i had just gotten them.
At that time I was limiting myself to only garments. Back home in the Netherlands there weren’t as many quilt fabrics and most of them quit boring.

Then in 2008 I started working in a quilt store. Wow I had never seen so many fabulous quilt fabrics before, nothing boring about them. So by the end of ’08 I started quilting. Got my self a cutting mat and a cheap rotary cutter and there my new journey started.
Like I said, after a while you want to upgrade. Me being a firm believer in gingher quality I wanted their rotary cutter. No where to be found on the island. So amazon it was. And today when I checked my mailbox my package was waiting for. I was happy like a little girl with a new toy. Ok like a big girl with her new toy. I can’t wait to try it out. Ok why am I writing a blog about it and not cutting yet?

20120317-144324.jpg

iPad cover

Standard

On Clotilde.com I saw this cute pattern to make a cover for my iPad. I just had to have it. So when it came in I couldn’t wait to make it even though I didn’t have the stabilizer that they recommended. Yes I know I am impatience and a little stubborn. So I just improvised. I ended up using canvas and fusible fleece as stabilizer. The seams became a little bulkier, but still it is doing its job.
I will make it with the correct stabilizer as well, just to see the difference.

20120310-124831.jpg

20120310-124840.jpg

Now my iPad looks fashionable and is protected. And I love my iPad, quilting apps, quilting magazines, quilting patterns. It saves so much space not having all those loose patterns and magazines anymore.

Flower quilt

Standard

In a quilting magazine I saw this really cute quilt one time with big blocks and appliquéd circles. It looked so nice and easy, big blocks, should be fast right.
So one day in the fabric store I saw this collection of cute fabrics, one of them had a big flower on it. The quilt took form in my head, take away the circles and appliqué flowers. But the flowers ended up being bigger then the circles, so I had to recalculate everything.
Ok long story short, I got the fabric (Dutch film crew bought it for me, but that’s a different story) and I started working. The quilt took a little longer then expected, but I am happy with the end result.

20120309-202606.jpg

One of the appliqué flowers. I cut them out from there panel to appliqué them on my squares, to find out I miscalculated and I got have left them on their own panel and just stitch on there.

20120309-202803.jpg

So it took a little longer to make 13 flowers.

20120309-202859.jpg

Laying out the blocks.

20120309-202945.jpg

Adding pink sashing.

20120309-203028.jpg

Adding polka dot border. That was not on the pattern, but I felt inspired to add it. It gave me trouble with the backing.

20120309-203147.jpg

And an other border.

20120309-203229.jpg

Final border.

20120309-203307.jpg

The end result, it came a little bigger. Guess I need a bigger bed 😉

20120309-203353.jpg

And finally the backing.

I am really pleased with the end result, but not sure if I want to make a king size quilt anytime soon.

Patience corner

Standard

I had this pack of charm squares (I admit I still own several different packs) and I was wondering what to do with it. Now I have these really nice apps on my phone and iPad for quilting and one of these apps had different block designs. I browsed trough there to see if there was a block suitable for charms squares with out having to cut them up. (what you mean lazy) The patience corner was just what I was looking for.
Of course with my big fabric stash, I didn’t have the right colors to go with my charm pack. So shopping I went. I could have calculated how much I needed of everything, but that would have been way to easy. I ended up buying a yard of four complimentary colors. At the end I should have bought more of the red, because I ended up wanting to use that for the border. That was an other trip to the store and no more of the same fabric. Ah well it looks pretty with kona cotton I used.
And after putting the blocks together I realized I wanted sashing. I choice blue to brighten everything up a little.

20120301-062300.jpg

20120301-062307.jpg

20120301-062315.jpg

20120301-062334.jpg

Trying to figure out the blocks and the lay out.

20120301-062425.jpg

First block done, so far so good.

20120301-062503.jpg

Adding sashing

20120301-062536.jpg

Sashing all done, time to start adding the borders.

20120301-062615.jpg

And off to the quilter it can go. (I so need to learn to do that myself)

20120301-062716.jpg

I am pretty pleased with the end result. Hopefully the receiver will be too.

20120301-062808.jpg

Close up of the quilting.

Stupendous stitching

Standard

I am so happy I discovered craftsy.com. There are so many good classes on there. Lot of great ideas from other crafters. Just a really great way to get inspired.
So at craftsy i had signed up for my first online class. For a long time already I have wanted to take my first steps into art quilting, but never knew where to start. Then I found stupendous stitching and that looked easy enough. I had a lot of fun creating my little project.

20120229-062336.jpg

The first step was couching. Something I had never done before. And I like thing neat so I had to let go and just go.

20120229-062451.jpg

For the next step we got to try out all the fancy stitching on our machine. And I have a baby lock espire, and believe me it has a lot of fancy stitches on there.

20120229-062633.jpg

After that came the dreaded hand stitches. I have never been to fond of handwork, but I found that it can be really relaxing, except for when you try to work with ribbon, that was a little frustrating.

20120229-062834.jpg

Time to quilt. Good place to start. It was nice size and just stitching between the lines. I can now say I quilted my first quilt. 🙂

20120229-062947.jpg

Time to put the cord binding. I choose silver, I just like shiny and sparkly things. Like my boy friend says, I am such a girl.

20120229-063057.jpg

I highly recommend craftsy and their awesome online classes. You can retake them over and over. A lot of times they are on special and you pay less then $30 and it is well worth the money.
I have several more online classes lined up to explore more of the art quilting. I am really excited about all these new techniques that I am learning.